Kinetic typography — letters popping in one at a time while the camera is constantly moving around — has basically been an After Effects job for the last twenty years.
Not because the animation itself is particularly hard. It's everything around it. You need the font installed. You need a composition. You need to keyframe the letters. And then, inevitably, you change one word and suddenly you're keyframing everything again.
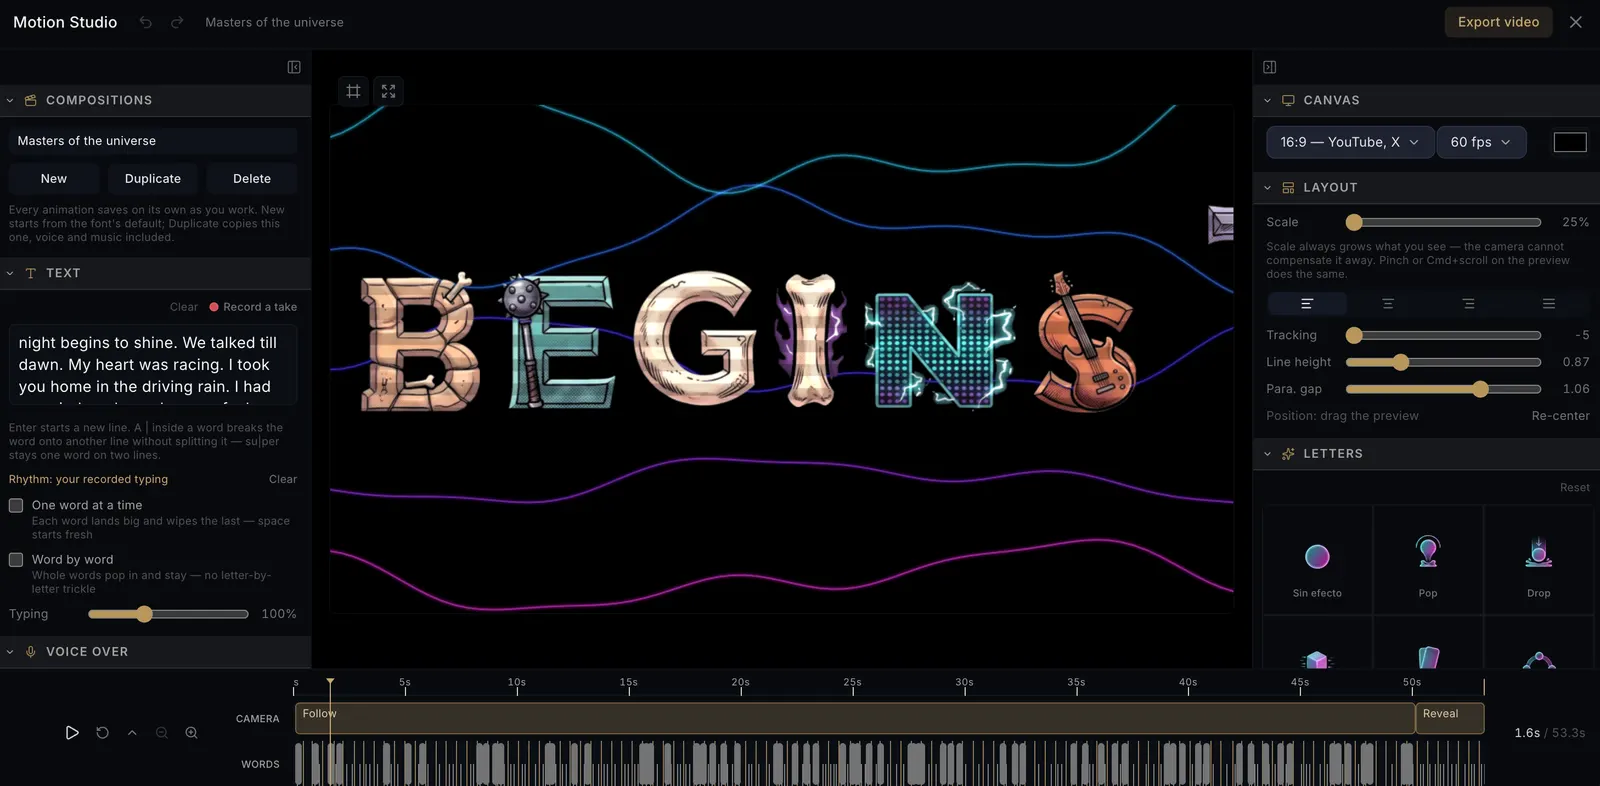
Motion Studio takes a different approach. It's basically the other half of the font generator: you describe a typeface and get one, then you animate that typeface right there in the same app, using the same glyphs. No font files to install, no jumping between tools.
Here's what you can do with it.
What comes out
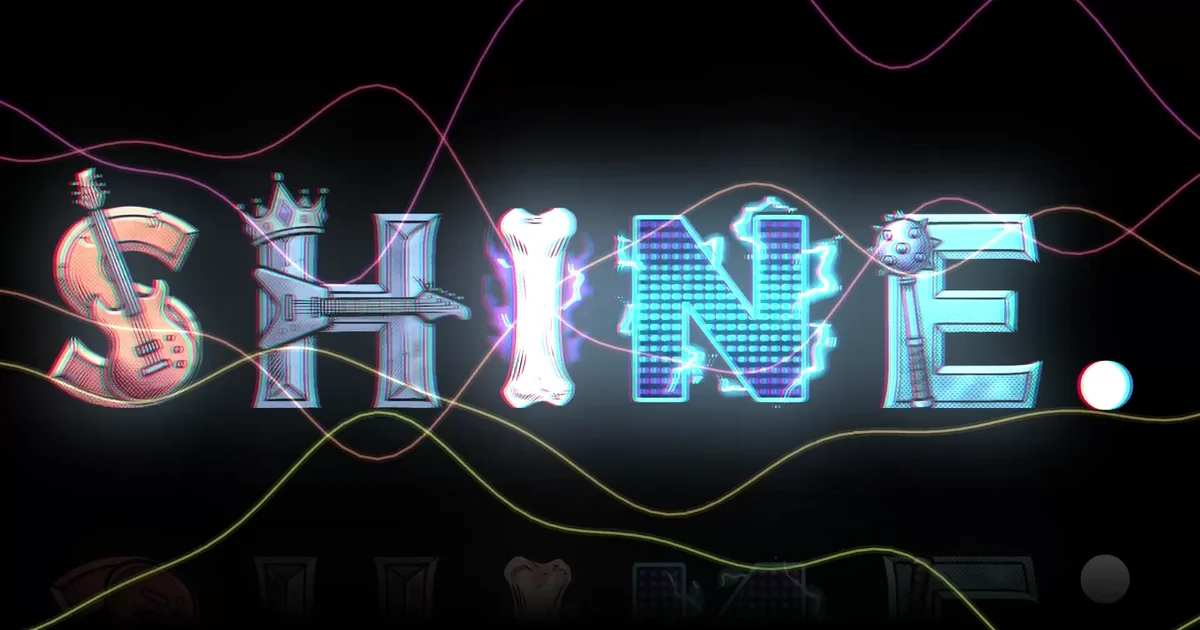
Every word is timed to the track, and the letters are the actual artwork from the generated font rather than some effect slapped onto a normal system typeface.
In this example the text is the lyrics of a song, landing on the beat of the track they came from. Motion Studio can transcribe an uploaded song and give you the lyrics already timed to the singing. That's covered further down, but honestly, it's the feature that turns something like this from a week-long project back into an afternoon.
The Masters of the Universe letters in that clip
The typeface is called Masters of the Universe. It's an eighties fantasy-cartoon style font made from swords, axes, crowns, cracked stone and purple lightning. And no, it wasn't picked from a font library. It isn't in one.
I described what I wanted, and the font was drawn from scratch. Every character is its own piece of artwork. That's why the S has a guitar inside it, the I is a bone instead of a simple vertical bar, and the E ends in a mace.
And this is where things get interesting compared with a traditional motion tool. In After Effects you're ultimately animating a font file. The letters are outlines. You can scale them, stroke them, extrude them, light them up, distort them, whatever — but the E is still an E.
Here the letters are artwork from the beginning. So when the camera pushes into one, it's actually pushing into an illustration. And the closer you get, the more details there are to discover.
You type, and that's the timeline
There isn't a traditional keyframe track for every letter. You type a line, and the letters appear in the order you typed them. One dial controls the speed.
From there you're mostly tweaking a rhythm that already exists, instead of starting with a completely empty timeline.
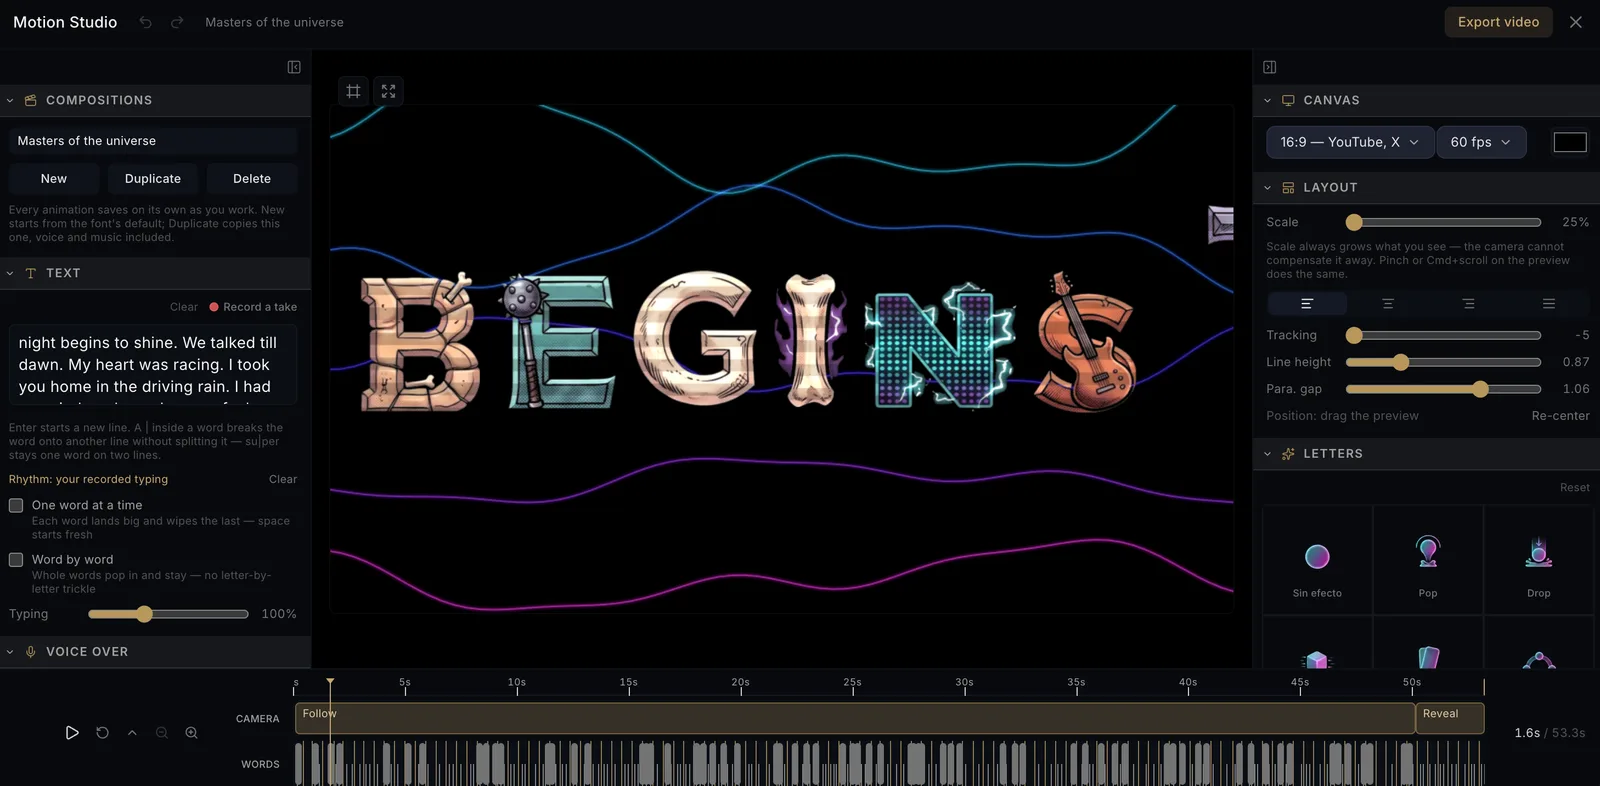
A few things you can do:
- Record a take: press record, type the line, and your actual typing becomes the timing. Even the little hesitation before the last word is captured.
- Word pauses: drag the end of a word on the timeline if you want it to hang there a little longer.
- One word at a time: each word lands big and wipes the previous one away, turning a long sentence into a sequence of cards instead of one giant paragraph.
- Max size every word: every word gets fitted to the frame independently, so a tiny word doesn't end up inheriting the size of the longest word.
- Word by word: words pop in and stay instead of slowly appearing one letter at a time.
- Soft line breaks: put a pipe character inside a word to split it across two lines without actually splitting the word as far as the animation is concerned.
The bigger idea here is what everything is attached to. Camera moves, timing and effects are tied to the text — after this word, on this letter — rather than at 12.4 seconds.
That sounds like a small distinction, but it makes a huge difference. Change the text and the animation stays attached to it. You don't end up with a bunch of carefully made keyframes sitting there pointing at the wrong thing.
Twelve ways for a letter to arrive
Pop, Drop, Shake, Wiggle, Jump, Float, Glitch, Fly, Implode, Teleport, Stamp and Flip. Some settle into place and stop. Others keep moving a little after they land, so the finished line doesn't just become a static image.
Teleport, for example, arrives blurred and compressed, then snaps into focus as it lands. Stamp comes down from huge, hits with a splat and bounces. Flip works like a split-flap display, flipping past vertical before opening up.
There's also a finale effect, which is a little different from the normal letter entrances. At the end of the clip every character shoots outward from the center of the text block, each with its own spin, distance and delay.
Pair that with the Implode entrance and you get a piece that starts from nothing and ends at nothing. Which, conveniently, is also a pretty easy way to make a seamless loop.
A camera, not a zoom slider
The camera has its own little script based on beats. A beat is basically a verb plus a place in the text: follow the letters, hold, reveal, punch in, glide to a specific framing, and so on.
There are ten presets to get you started:
- Chase & reveal: follows each letter up close, then zooms out at the end.
- Macro: stays extremely close to the letters and only pulls out at the very end.
- One letter: each letter fills the entire frame.
- Typewriter: stays locked in close, holds for a beat, then reveals the text.
- Word punch: jumps hard from word to word, with each word filling the frame.
- Last word: follows the typing and then dives into the final word.
- Wide shot: shows the whole phrase with no camera movement.
- Push in: starts with the whole phrase and slowly pushes into the middle.
- Pull back: starts tight on the center and pulls out to reveal everything.
- Waltz: gently moves toward the phrase and back out again.
You can open up the beats and edit them, or add your own. Change the verb, move the anchor to another word, change the framing, adjust the easing — whatever you need.
The important bit is that the beat is attached to a word, not a timestamp. So if you add another word earlier in the sentence, the camera move moves with the text instead of getting stranded at the old timestamp.
Give it a voice
You can also generate a voice-over directly from the text on the canvas, without leaving the studio. There are three voices to choose from.
The voice itself isn't really the interesting part. The useful part is the timing that comes back with it. Motion Studio knows when each word is spoken, so it can retime the animation to the narration instead of forcing you to make the narration fit the animation.
- Sync text to the voice: letters land as the words are spoken, either letter by letter or one word at a time for more of a karaoke effect.
- Move a word: the voice lane shows each spoken word as its own clip, with the actual word printed on it. Drag it to move that part of the audio. Only the section you changed gets cut, so breaths and everything around it stay intact.
- Volume curves: double-click the lane to add a point and drag it. You can do this independently for the voice and music. If you add a curve to the music, it takes over from the automatic ducking, so the track can come all the way back up between lines.
Or just give it a song
The soundtrack slot can take a track you generated in the studio, something from the library, or your own MP3, M4A or WAV. And yes, you can upload an entire song. Not just a ten-second music bed.
Then Motion Studio listens to it.
- Sync text to the beat: it finds the accents in the track and puts the first letter of each word on them, with the rest of the word filling into the smaller pulses between them.
- Every beat, every second, every third: useful when the song is slower. Words can land on every Nth accent while the skipped beats are still available for the individual letters.
- Read the lyrics: upload a song and Motion Studio transcribes the vocals. The sung words become your animated text, already timed to the performance. Move the starting point, run it again, and you can grab the next verse.
- End on the music loop: the timeline marks each time the song completes a pass, and the end marker can snap to those points. That way your exported animation can loop without a noticeable break in the audio.
The scene around the letters
The letters are obviously the main event, but there's a bunch of stuff happening behind them too.
- Backdrop: nine procedural scenes — waves, bokeh, petals, confetti, beams, blocks, pixels, discs and a flipping tile wall. They're drawn behind the camera, so the camera can move through them. New arrangements are generated on every beat, and the motion follows the music rather than simply reacting to volume.
- Scene FX: reflection, breathing neon glow in any color, VHS channel separation, sweeping spotlight, film grain, scanlines and vignette.
- Effect stretches: pin an effect to a specific letter for a specific length. So if you want a chromatic glitch on one word, you don't have to glitch the entire video.
- Color: brightness, contrast, saturation, hue and warmth can all be adjusted separately for the text and backdrop. You also get opacity and a drop shadow for the type.
Getting it out
The canvas comes in five formats depending on where you're posting: 9:16 for TikTok, Reels and Shorts, 4:5 for Instagram posts, 1:1, 16:9 for YouTube and X, and 21:9 if you want something more cinematic.
Export gives you an H.264 MP4 with the audio mixed in, up to one minute long. The video downloads normally, and it also gets added to your library using the words in the animation — so six months later you can search for the line itself and actually find the clip.
One detail is worth calling out, because it's something that tends to go wrong with tools like this: the preview and the export use the same renderer, frame for frame. So what you see while scrubbing through the timeline is what you get in the final video. Export uses WebCodecs, which in practice means Chrome.
Each font can have as many compositions as you want, and everything is autosaved while you work. Undo also works across the whole document — text, camera, effects and audio settings included. Generating a voice or music track uses credits. Uploading your own files doesn't.
Where to find it
Open any font you've made and press Motion Studio. And if you haven't made one yet, that's the first half of this: describe a typeface, get a full character set drawn in it, and it's animatable the moment it exists.